Standard Process
Please note, that the screenshots used are solely intended for illustration purposes and may differ from the actual screens. All sensitive data, such as personal information, credit card details, etc., displayed on the example screens is as well intended for solely illustration purposes and does not represent real production data.
With the "Standard" payment type, the amount is directly debited from the customer's E-Wallet account and credited to the specified Merchant Account as soon as the money is settled by the Acquirer.
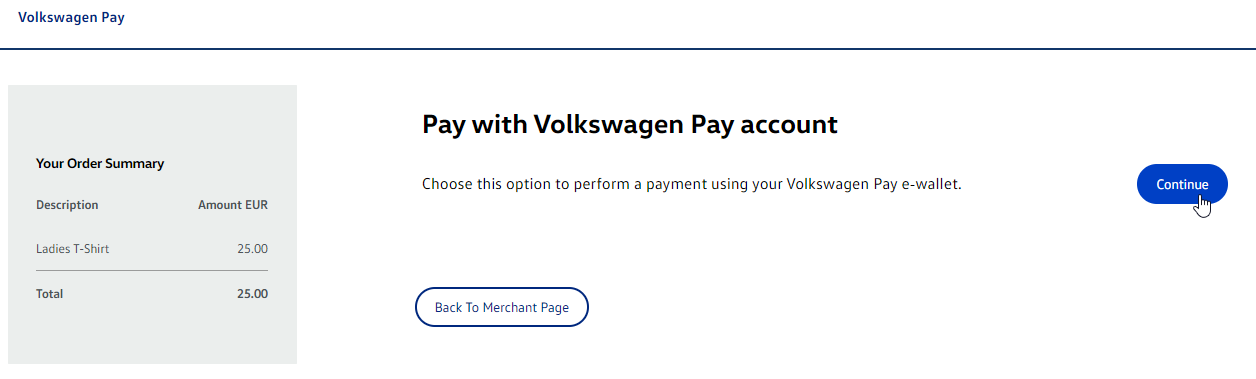
In the first step, the shopper chooses to pay with their E-Wallet account.
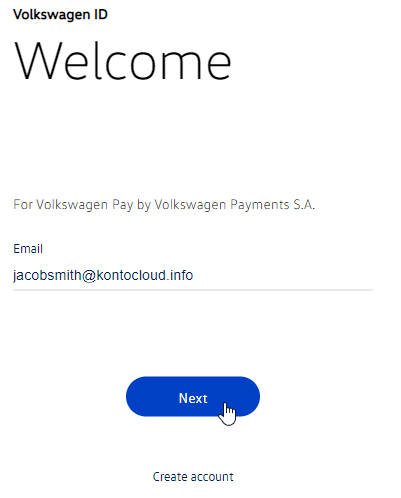
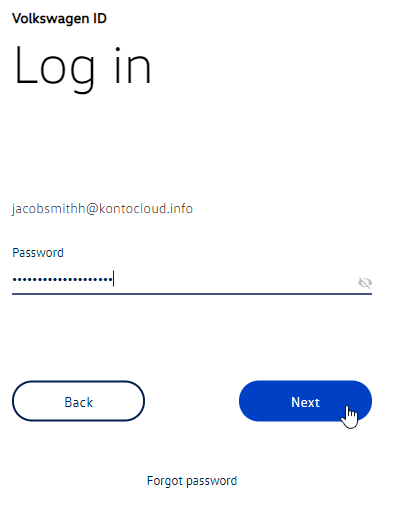
The customer is then redirected to the Login screen where they must either enter their login credentials or create a new user account.
Payment (New User)
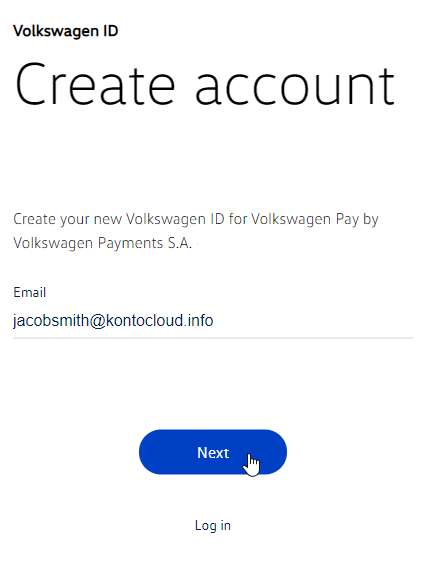
If you do not have ID yet, you create new user account by selecting "Create new account" in the Login screen.
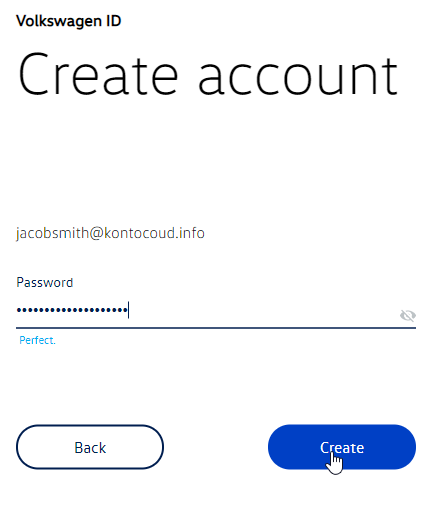
Enter your Email and Password in the registration form.
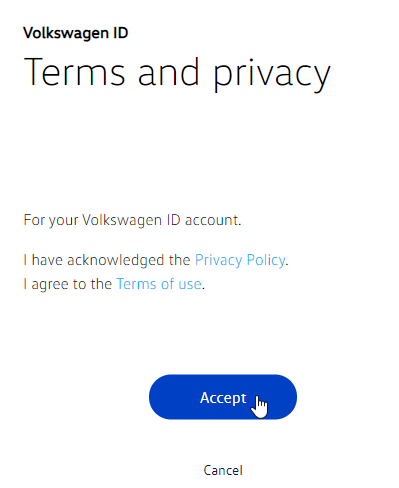
You can read the Privacy Policy and Terms of use. In order to continue from this step, you would need to accept them.
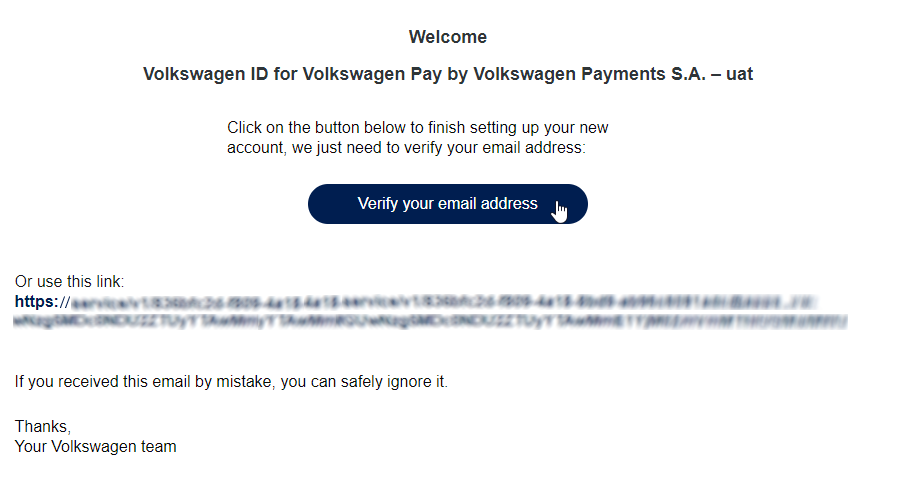
At this stage you receive an Email to verify your newly created user account. You need to click the confirmation button (or link) in this Email in order to have your account verified.
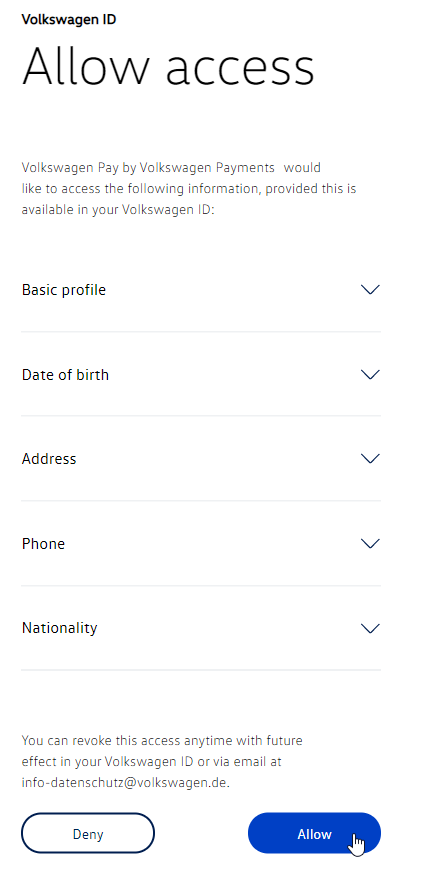
After the verification of your account you are being requested to allow access to information in your profile (provided this is available). Such as basic profile, date of birth, address, phone, nationality. You can revoke this access any time.
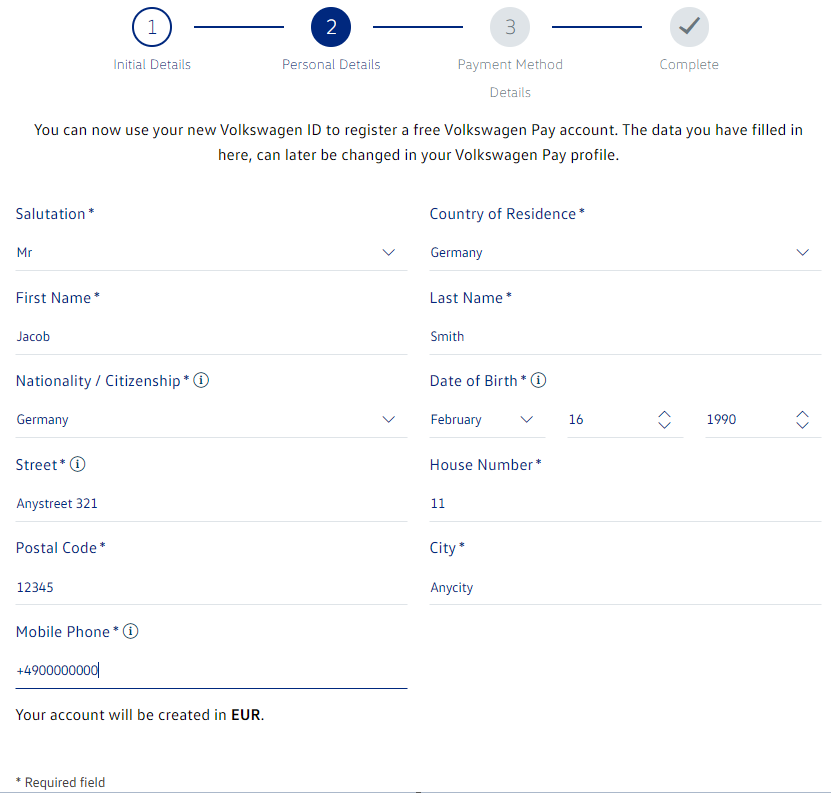
You are forwarded to step 2 of the setup where your personal details are collected, such as name, nationality, address, phone, etc. Please note that you need to provide an up to date phone and use up to date software in terms of operating system in order to be able to complete the payment flow.
Two-Factor Authentication Setup (2FA)
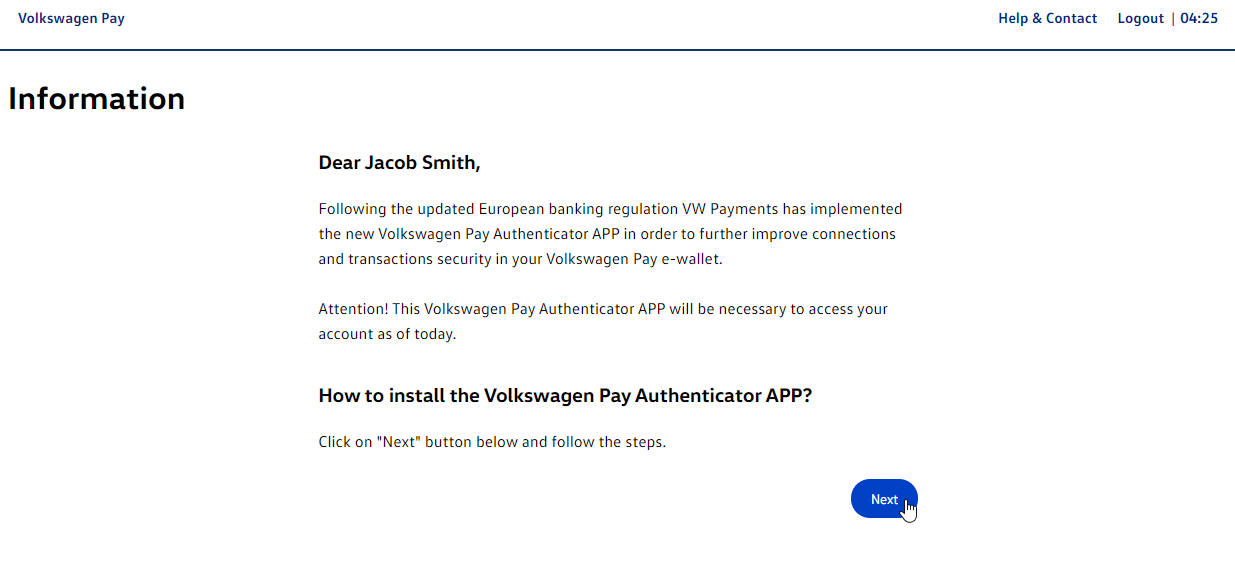
Part of the registration process is setting up a 2-factor authentication for your account. In the next couple of steps we will guide you through the 2FA setup process.
The first step is informational and it introduces you to 2FA and the need for it, following the updated European banking regulation.
Then you enter the Authenticator Setup process. At this stage you need to install the Authenticator APP from Pay on your phone or tablet device. You can find it in the Google Play or App Store. Once you have it installed you can continue with the next step.

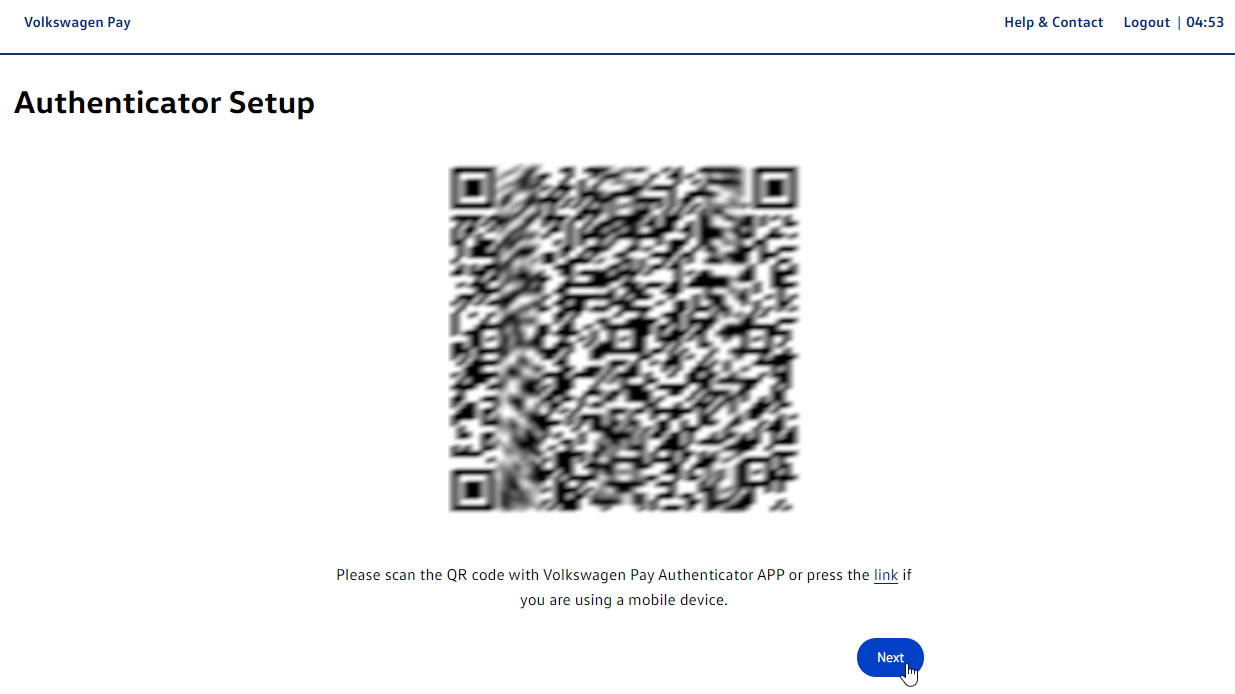
At this step you need to use your Authenticator APP, previously installed on your phone or tablet, and scan the presented QR code from the screen (or press a link, if you are doing the registration process via phone).
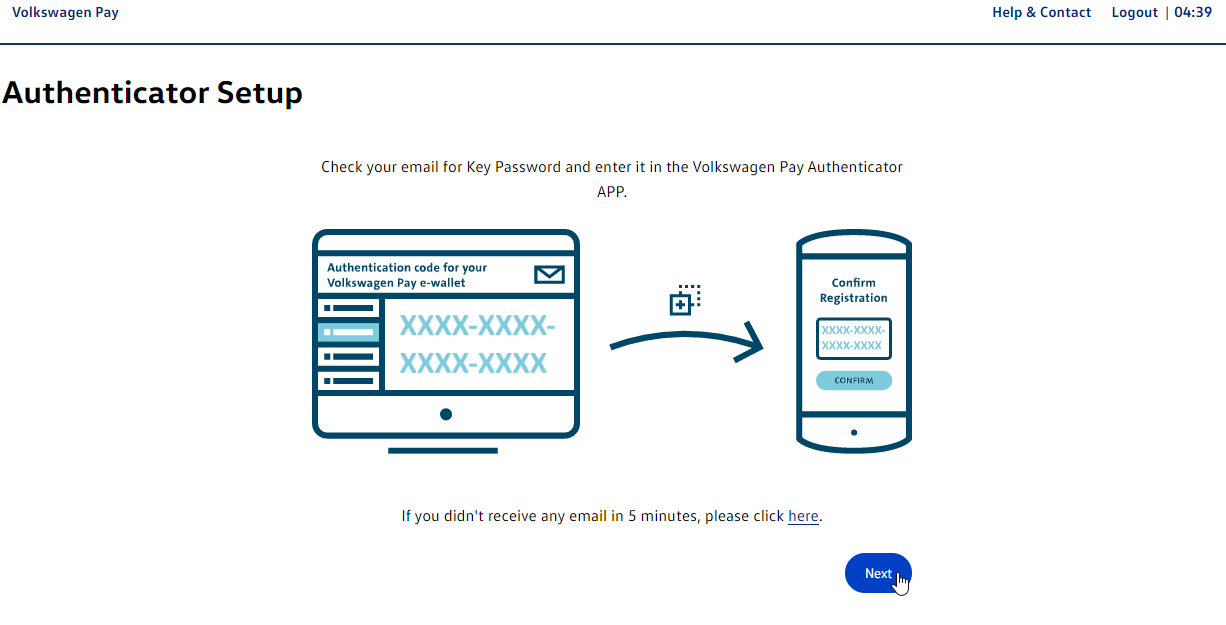
Now you need to check your Email for a Key Password. Then this password needs to be entered in your Pay Authenticator APP (on your phone or tablet).
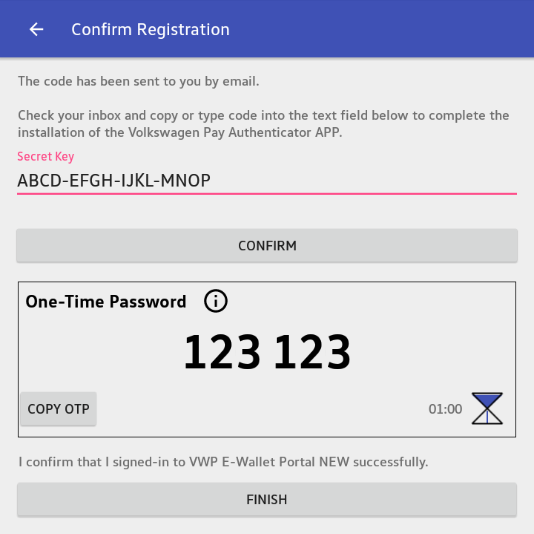
After entering the Key Password from the previous step, you will get a One-Time Password code, displayed in your Pay Authenticator App.
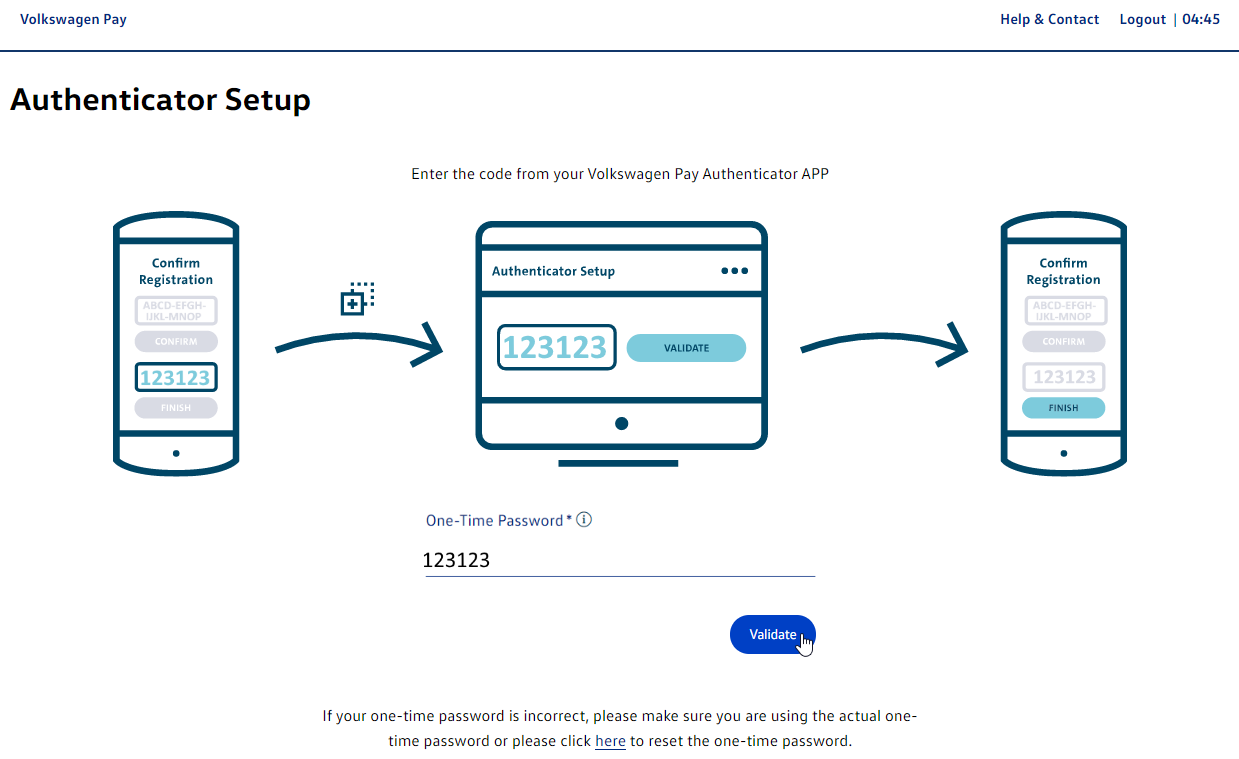
You need to enter this code from the app to the registration process page (as showed in the screen below). Once the code has been entered and the button labelled "Validate" was clicked, back in the app tap the button labelled "FINISH".
Adding payment method
Your account has been created successfully and now it's time to add a Payment Method.
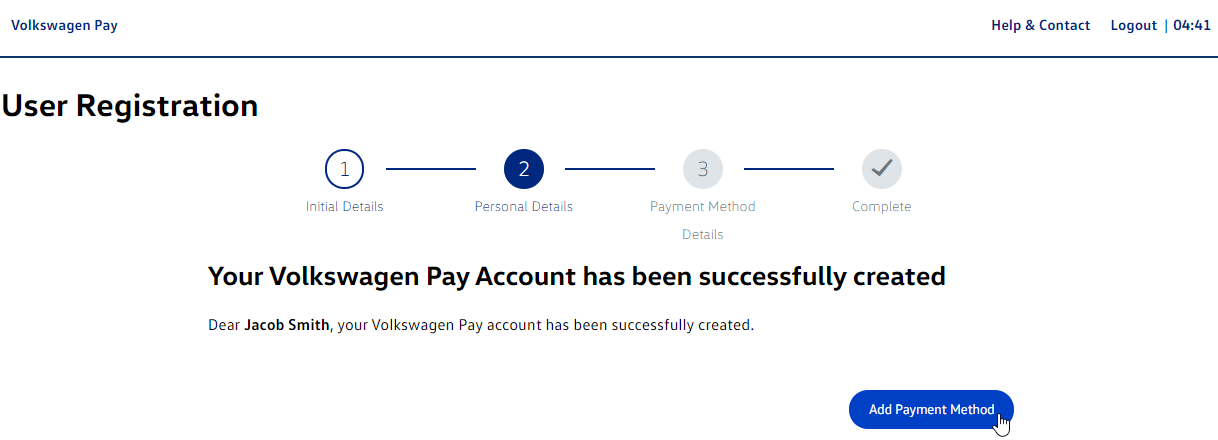
You can add a credit card or a bank account to your profile.
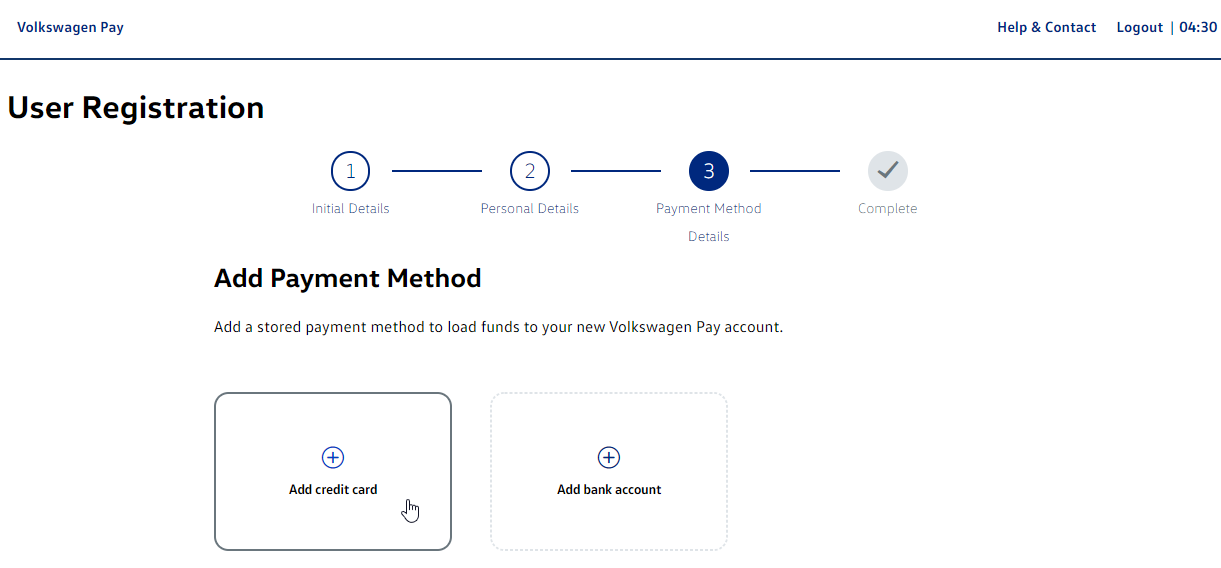
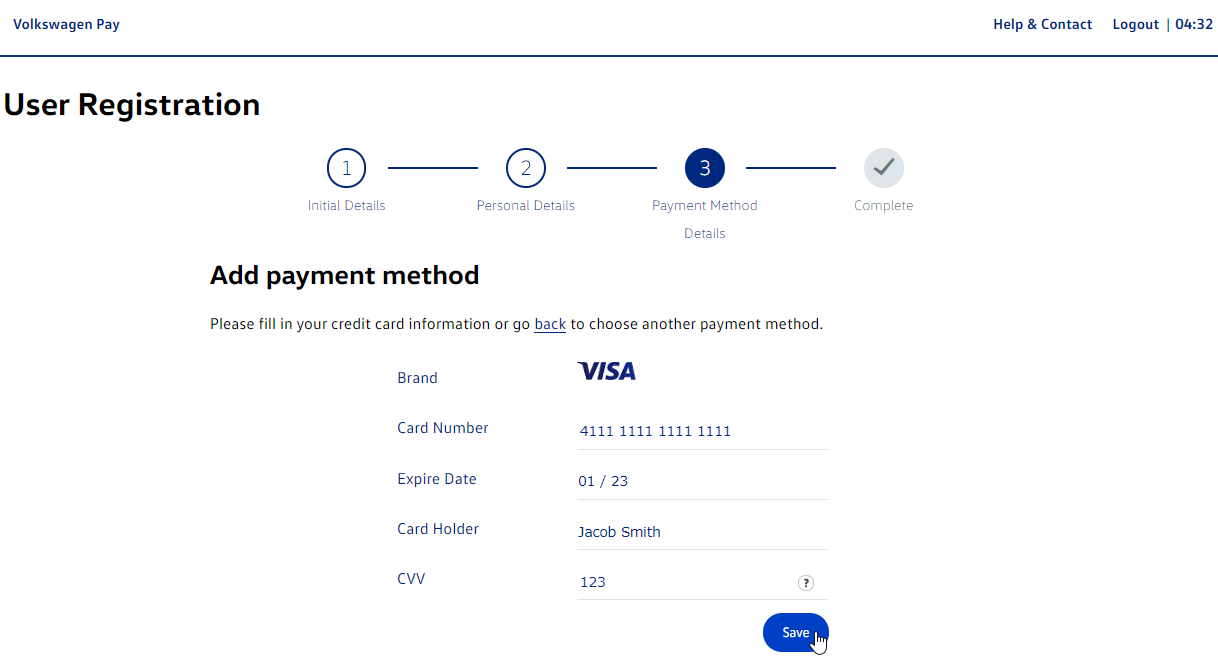
If you choose to add a credit card as a payment method, you just need to add your card info and save it.
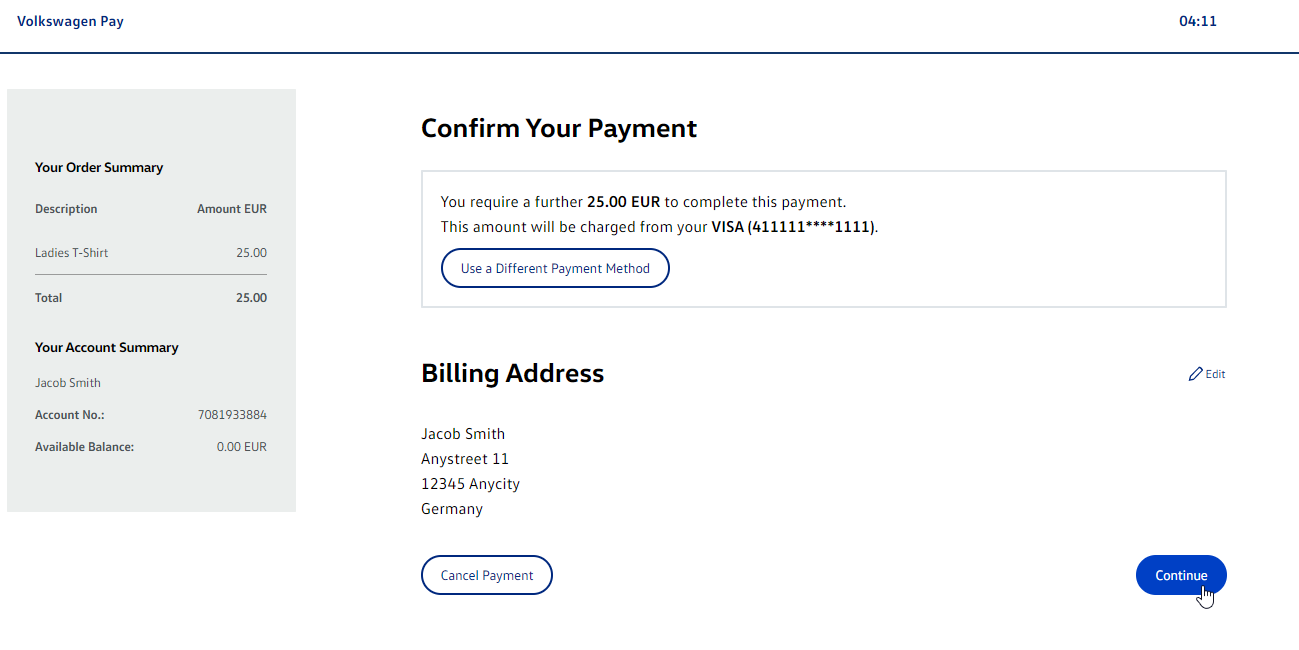
At this stage you are redirected back to the payment process where you can confirm your payment and continue with the previously added payment method. Alternatively you can use a different payment method.
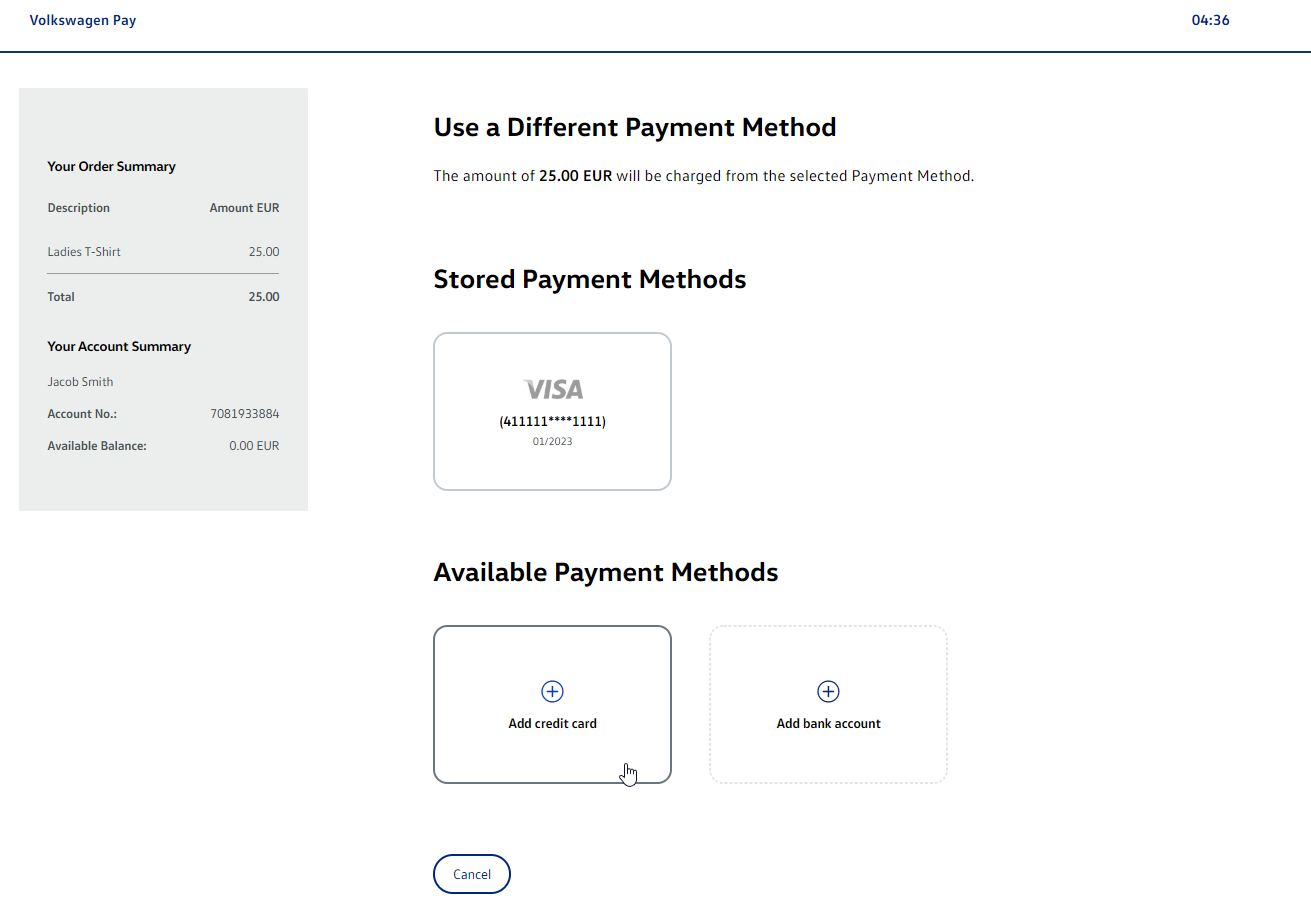
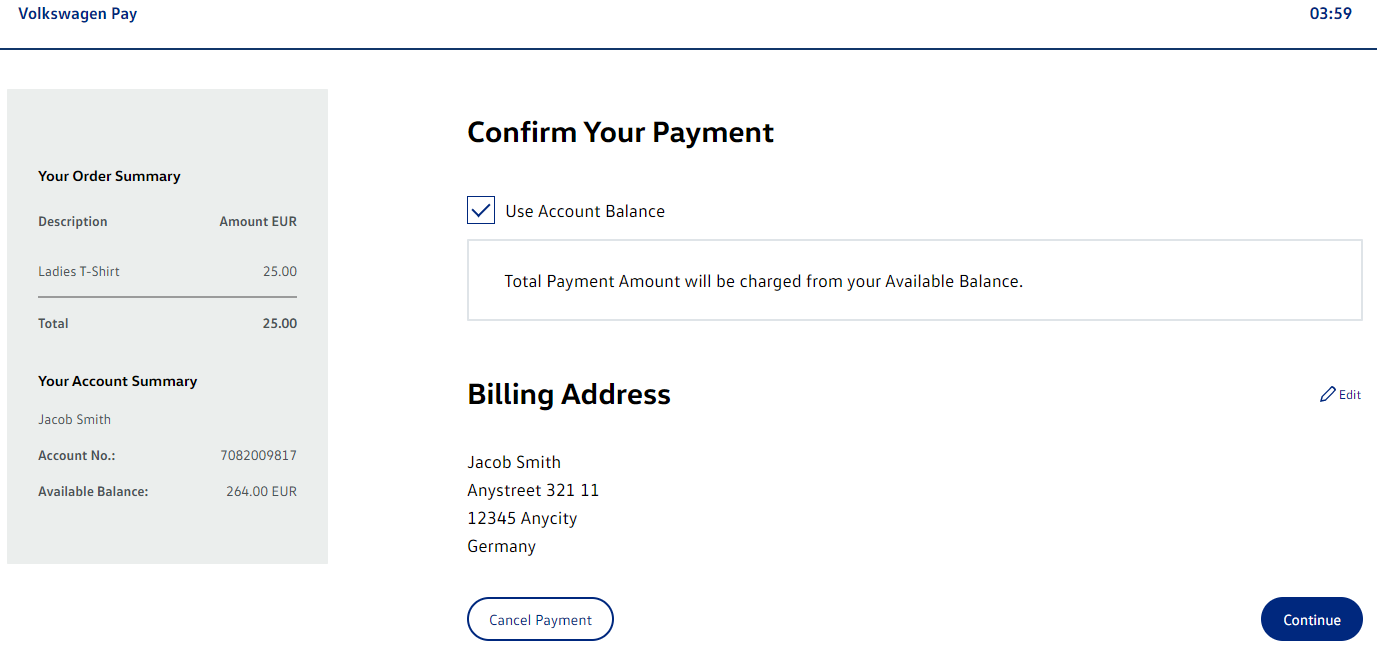
The order summary lists a description of all order items with the respective amount and the resultant total amount to be paid. Additionally, a short account summary with the individual account number and the available balance is shown.
By default, the billing address is provided by the profile settings, but can be specifically adapted for a payment.
In addition to the primary payment method you can store multiple others, both credit cards and/or bank accounts.
After selecting the desired payment method, you see last confirmation screen where you can finalize the payment.

Payment (Existing User)
If you already have a registered user account, you need to enter your credentials in order to log in to your e-wallet account.
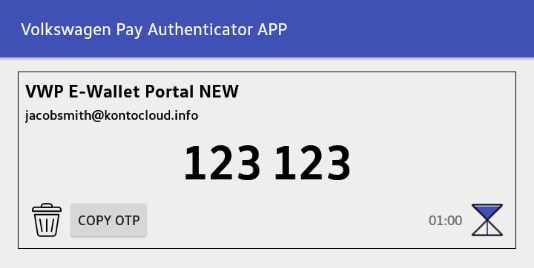
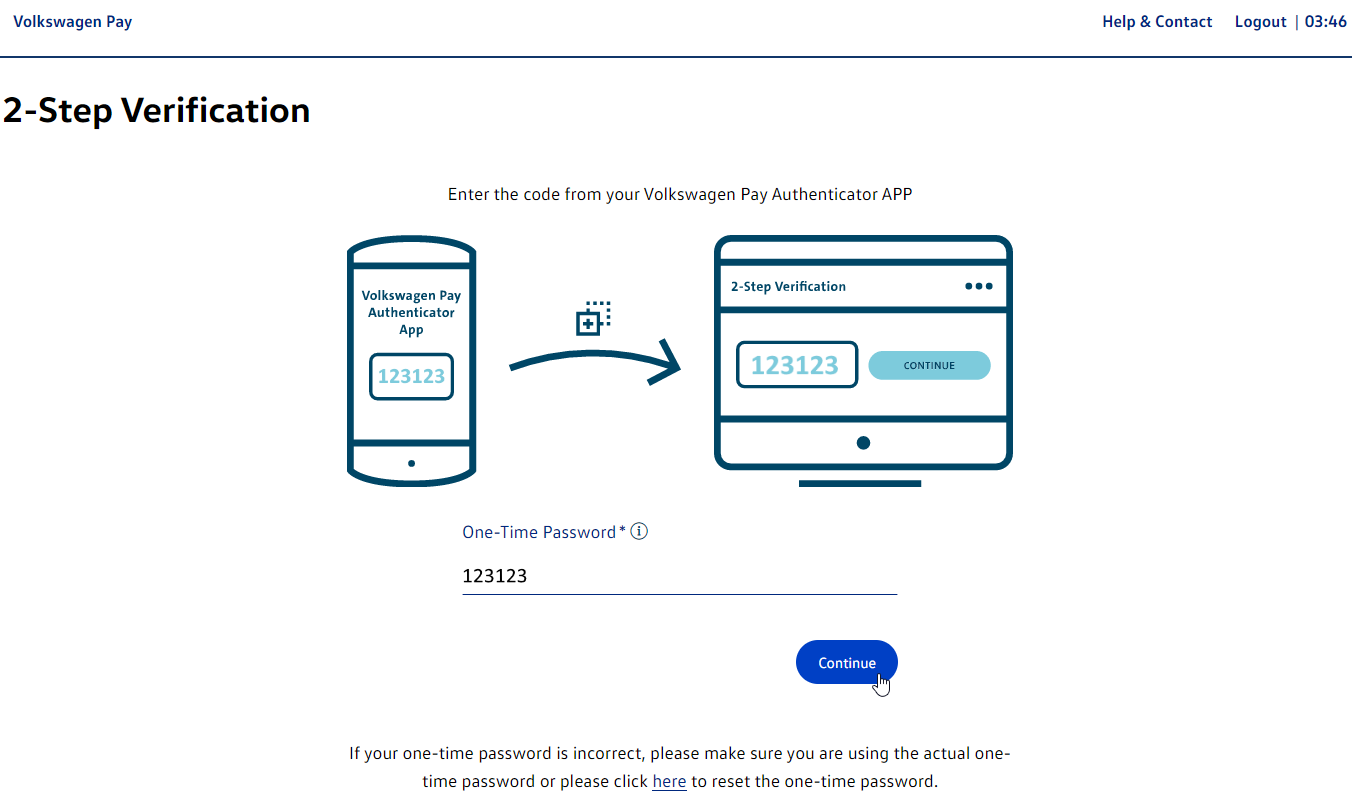
At this stage the 2-Step Verification screen will be displayed. If you have an existing user account your 2FA configuration has already been set up.
Open the Pay Authenticator App and get the One-Time Password code. You need to enter this code from the app to the registration process page (as showed in the screens below).
After a successful authentication, the payment confirmation page displays an overview of the payment details.
The order summary lists a description of all order items with the respective amount and the resultant total amount to be paid. Additionally, a short account summary with the individual account number and the available balance is shown.
By default, the billing address is provided by the profile settings, but can be specifically adapted for a payment.
In addition to payments using the Account Balance, there exists a large variety of payment options.
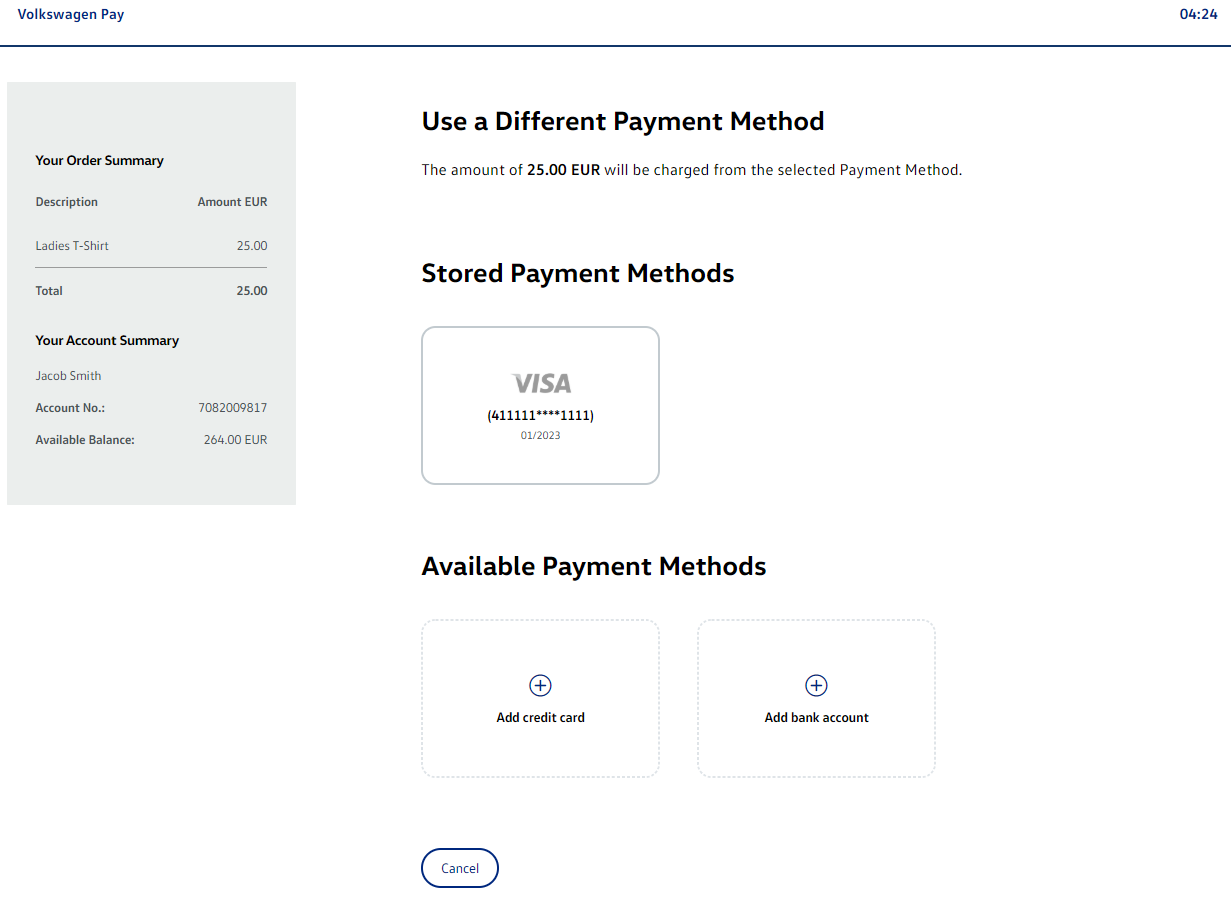
The customer can either select an already stored payment or add a new available payment option.
Until the shopper has chosen "Pay now", thus confirming the payment and allowing to debit the e-wallet, they can anytime cancel the payment.
In both cases they are redirected to the merchant page specified in the "callbackUrl" (see section Redirect to E-Wallet).